


Mermaid treasure chests & fairy boxes
a craft project (or two) to make for someone special

Do you have many tiny objects? Like necklaces and brooches and baubles and special rocks and feathers? Maybe someone in your life (your dad or grandpa?) has many watches, cufflinks, coins, or special rocks and treasures?
As promised, Bea and I have put together a more-involved sort of craft post for an indispensable top-of-dresser item: a treasure chest. The first thing you need to do is determine, are you (or the person you’re making this for) a mermaid type or a fairy type?
Here’s Bea on how to tell the difference:
Mermaids live in the ocean, though sometimes there can be freshwater mermaids (often called nymphs). If you’re this type of person you mainly love the water, swimming, being underwater, and singing. Mermaid colors are blue, purple, dark green, and pink. Also gold.
Fairies normally live on land and can be very tiny. They’re pretty impish. They love music and dancing and parties (fairy sized parties). Here’s one of their hobbies: playing pranks. Fairy colors are moss green, light green, gold, silver, and brown.
Both are, of course, magical, and both boxes are special keepsakes. I suppose you could just make a wonders of nature box, mixing it all up, and that would be pretty fantastic too.
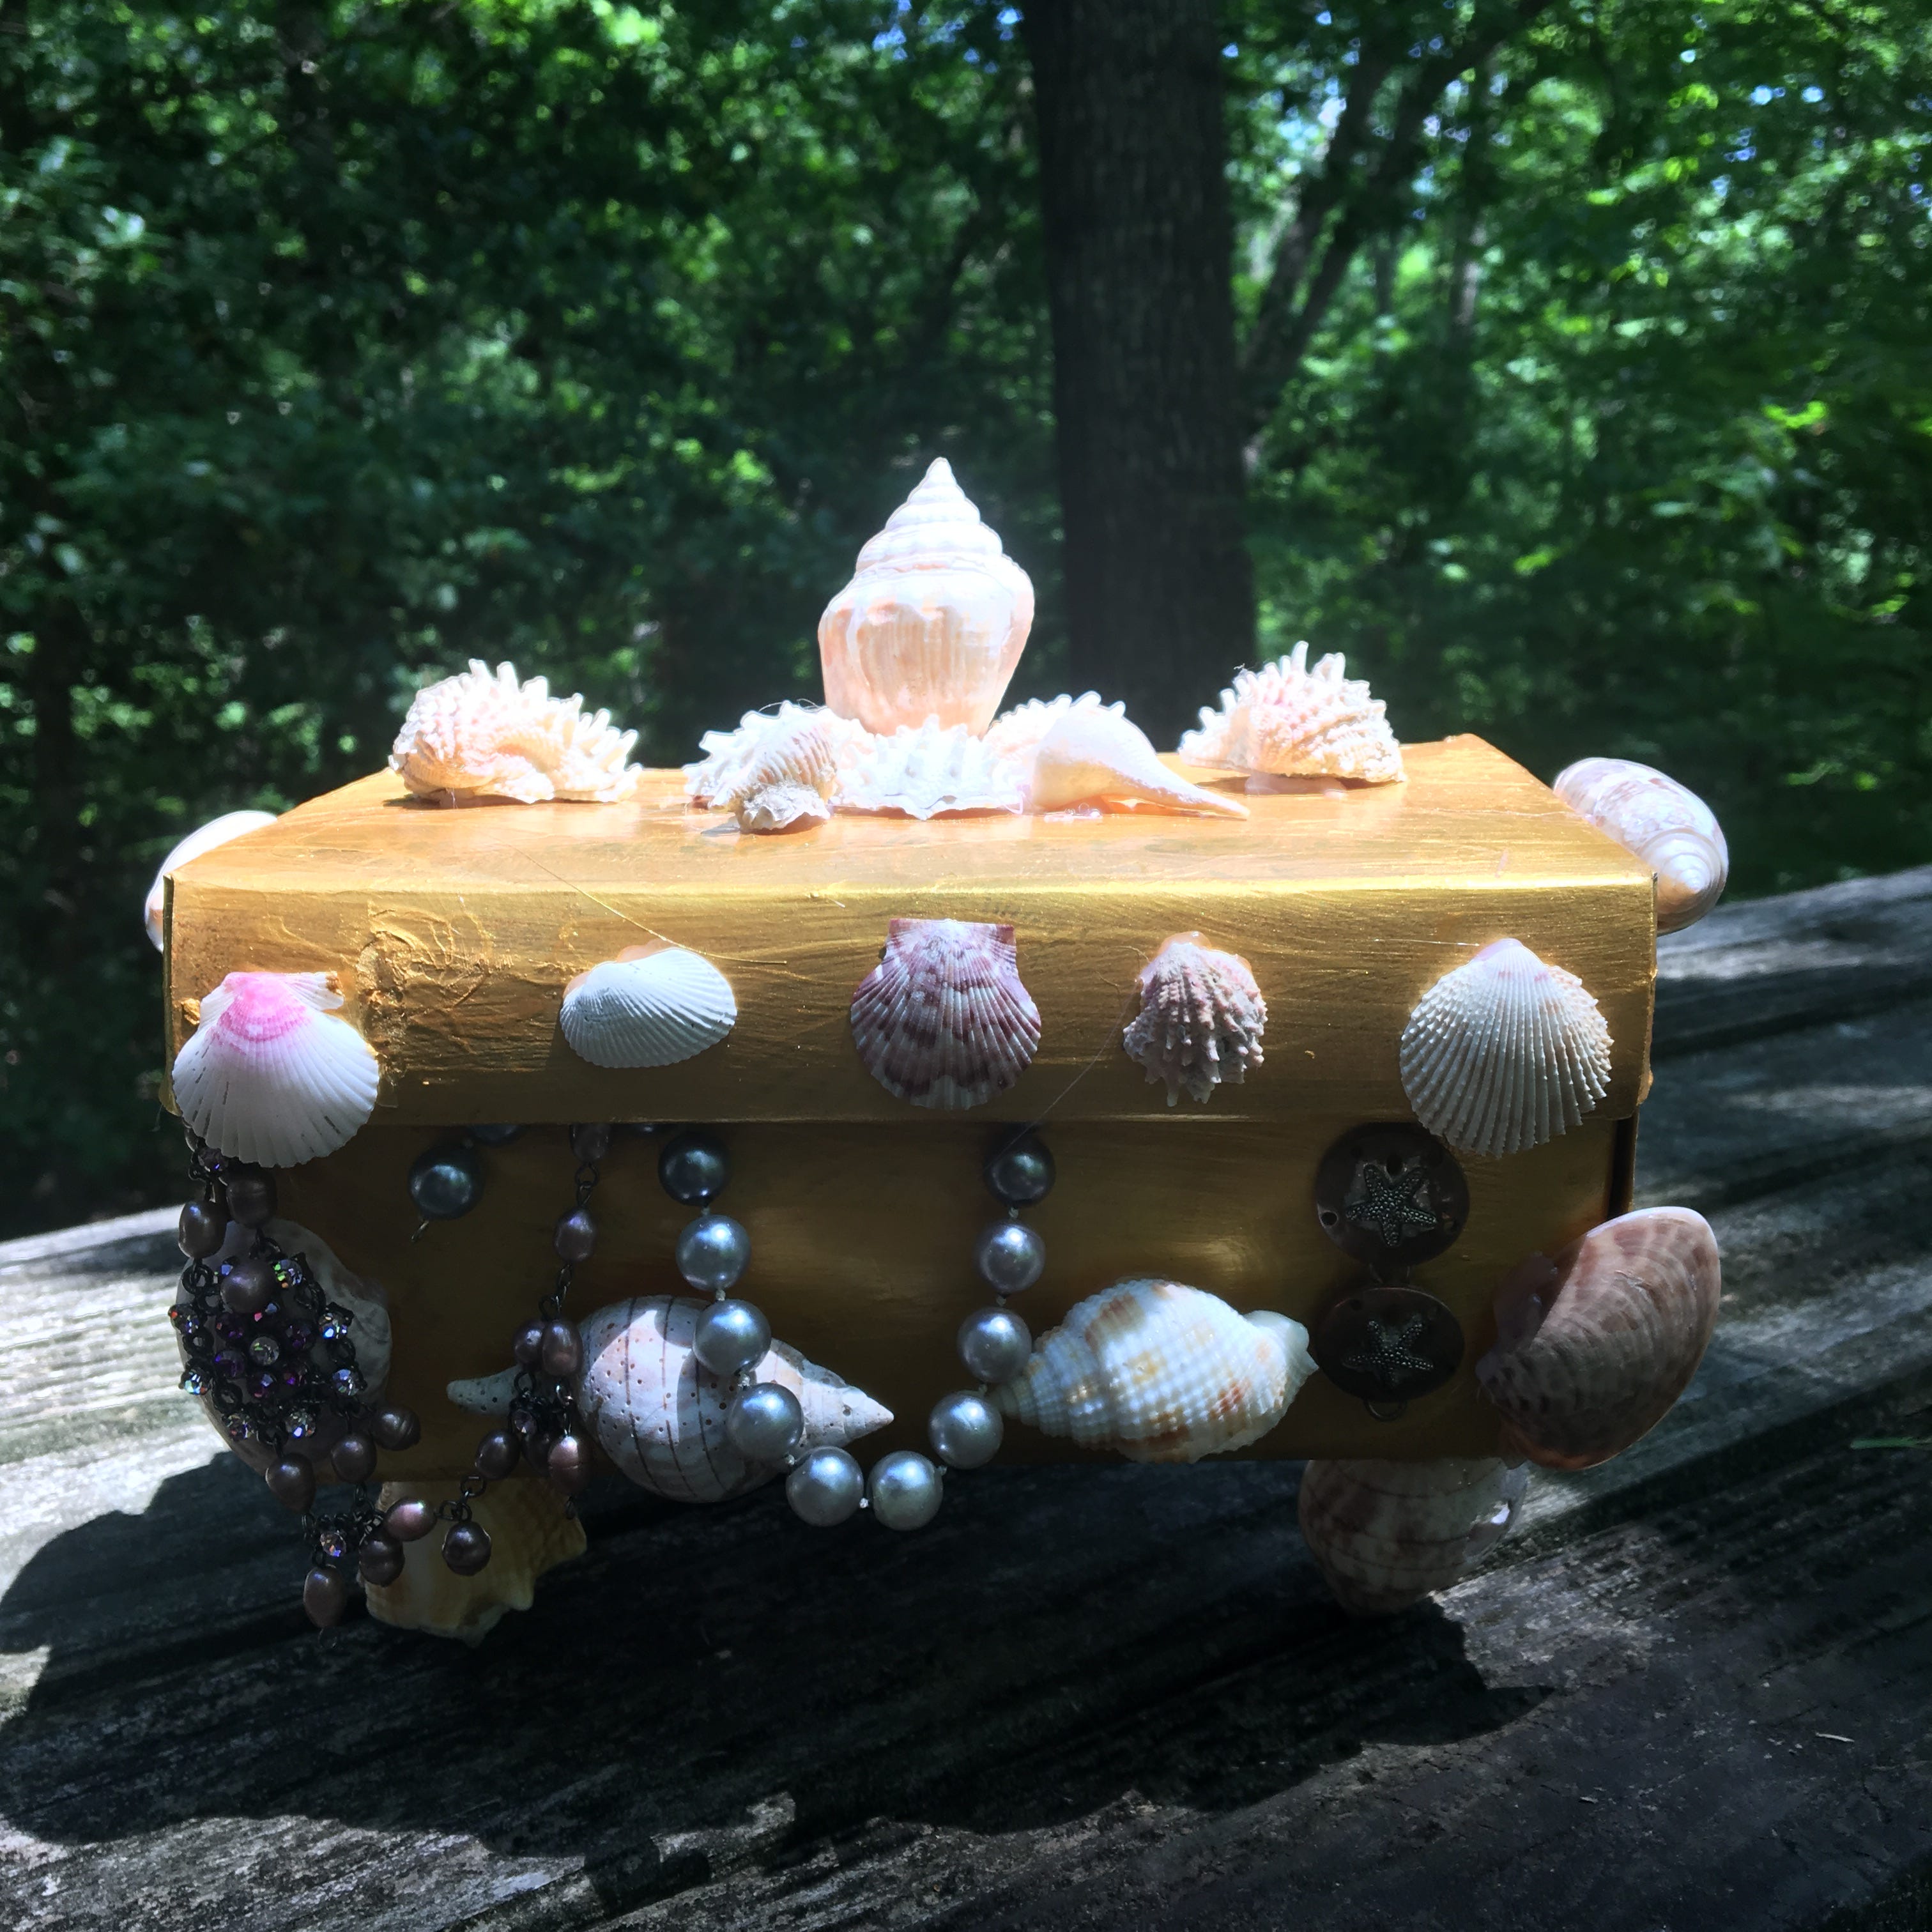
We started with the mermaid treasure chest, which was inspired by a fancy one we saw in Garden & Gun Magazine. I think what makes this box special is that it has a LOT of shells, and in particular that it rests on shell feet. That’s a great little detail and totally doable!
Here is what you need:
-A shoebox (small, like for your little sister’s shoes, is pretty precious. Kid-sized is also fine. The less writing/decoration on the box the better, because it will be easier to cover up).
-Paint and brushes (we used acrylic, because our box had a lot of writing). Or, if you don’t want to paint, wrapping paper).
-Many seashells (Mamie sometimes sends us shells, so we had a lot). Sea glass, also known as mermaids’ tears, would be great too!
-Glue, especially hot glue* which is easiest.
-Scissors
*Bea’s tips for using hot glue guns: use a low-temperature glue gun, and keep your hands away from the nozzle! Don’t touch the glue until you’re sure it’s dry and cool.
How to make a mermaid treasure box
1. First, unless you have so many shells that you can absolutely cover your shoebox, paint or otherwise cover your shoebox. We used gold paint, and did two coats. Let it dry.
2. Next, decide on an arrangement for your shells. We looked at the inspiration treasure box and decided we really wanted to do the feet and the shells on the side.
3. Start with the feet, because it’s the hardest part. We used four whelk shells for our feet. Turn the box upside down. Use your scissors to punch holes in each of the box’s four corners. Fit the top of the shell inside, and glue it in! Try to get all of the feet the same height, so the box will rest evenly on a flat surface. This will take trial and error but you can do it!
4. Next, attach cockle or scallop shells along the corners of the box’s lid, and olive shells (the kind that look like tubes or rolls) along the side as handles. Put a beautiful, maybe pointy shell on top. Keep adding shells until you like what you see!
5. If you want, you can paint your box with Mod Podge, or you can paint the inside or cover it in paper.
6. Fill with treasures—or present to your lucky recipient!
How to make a woodland fairy box
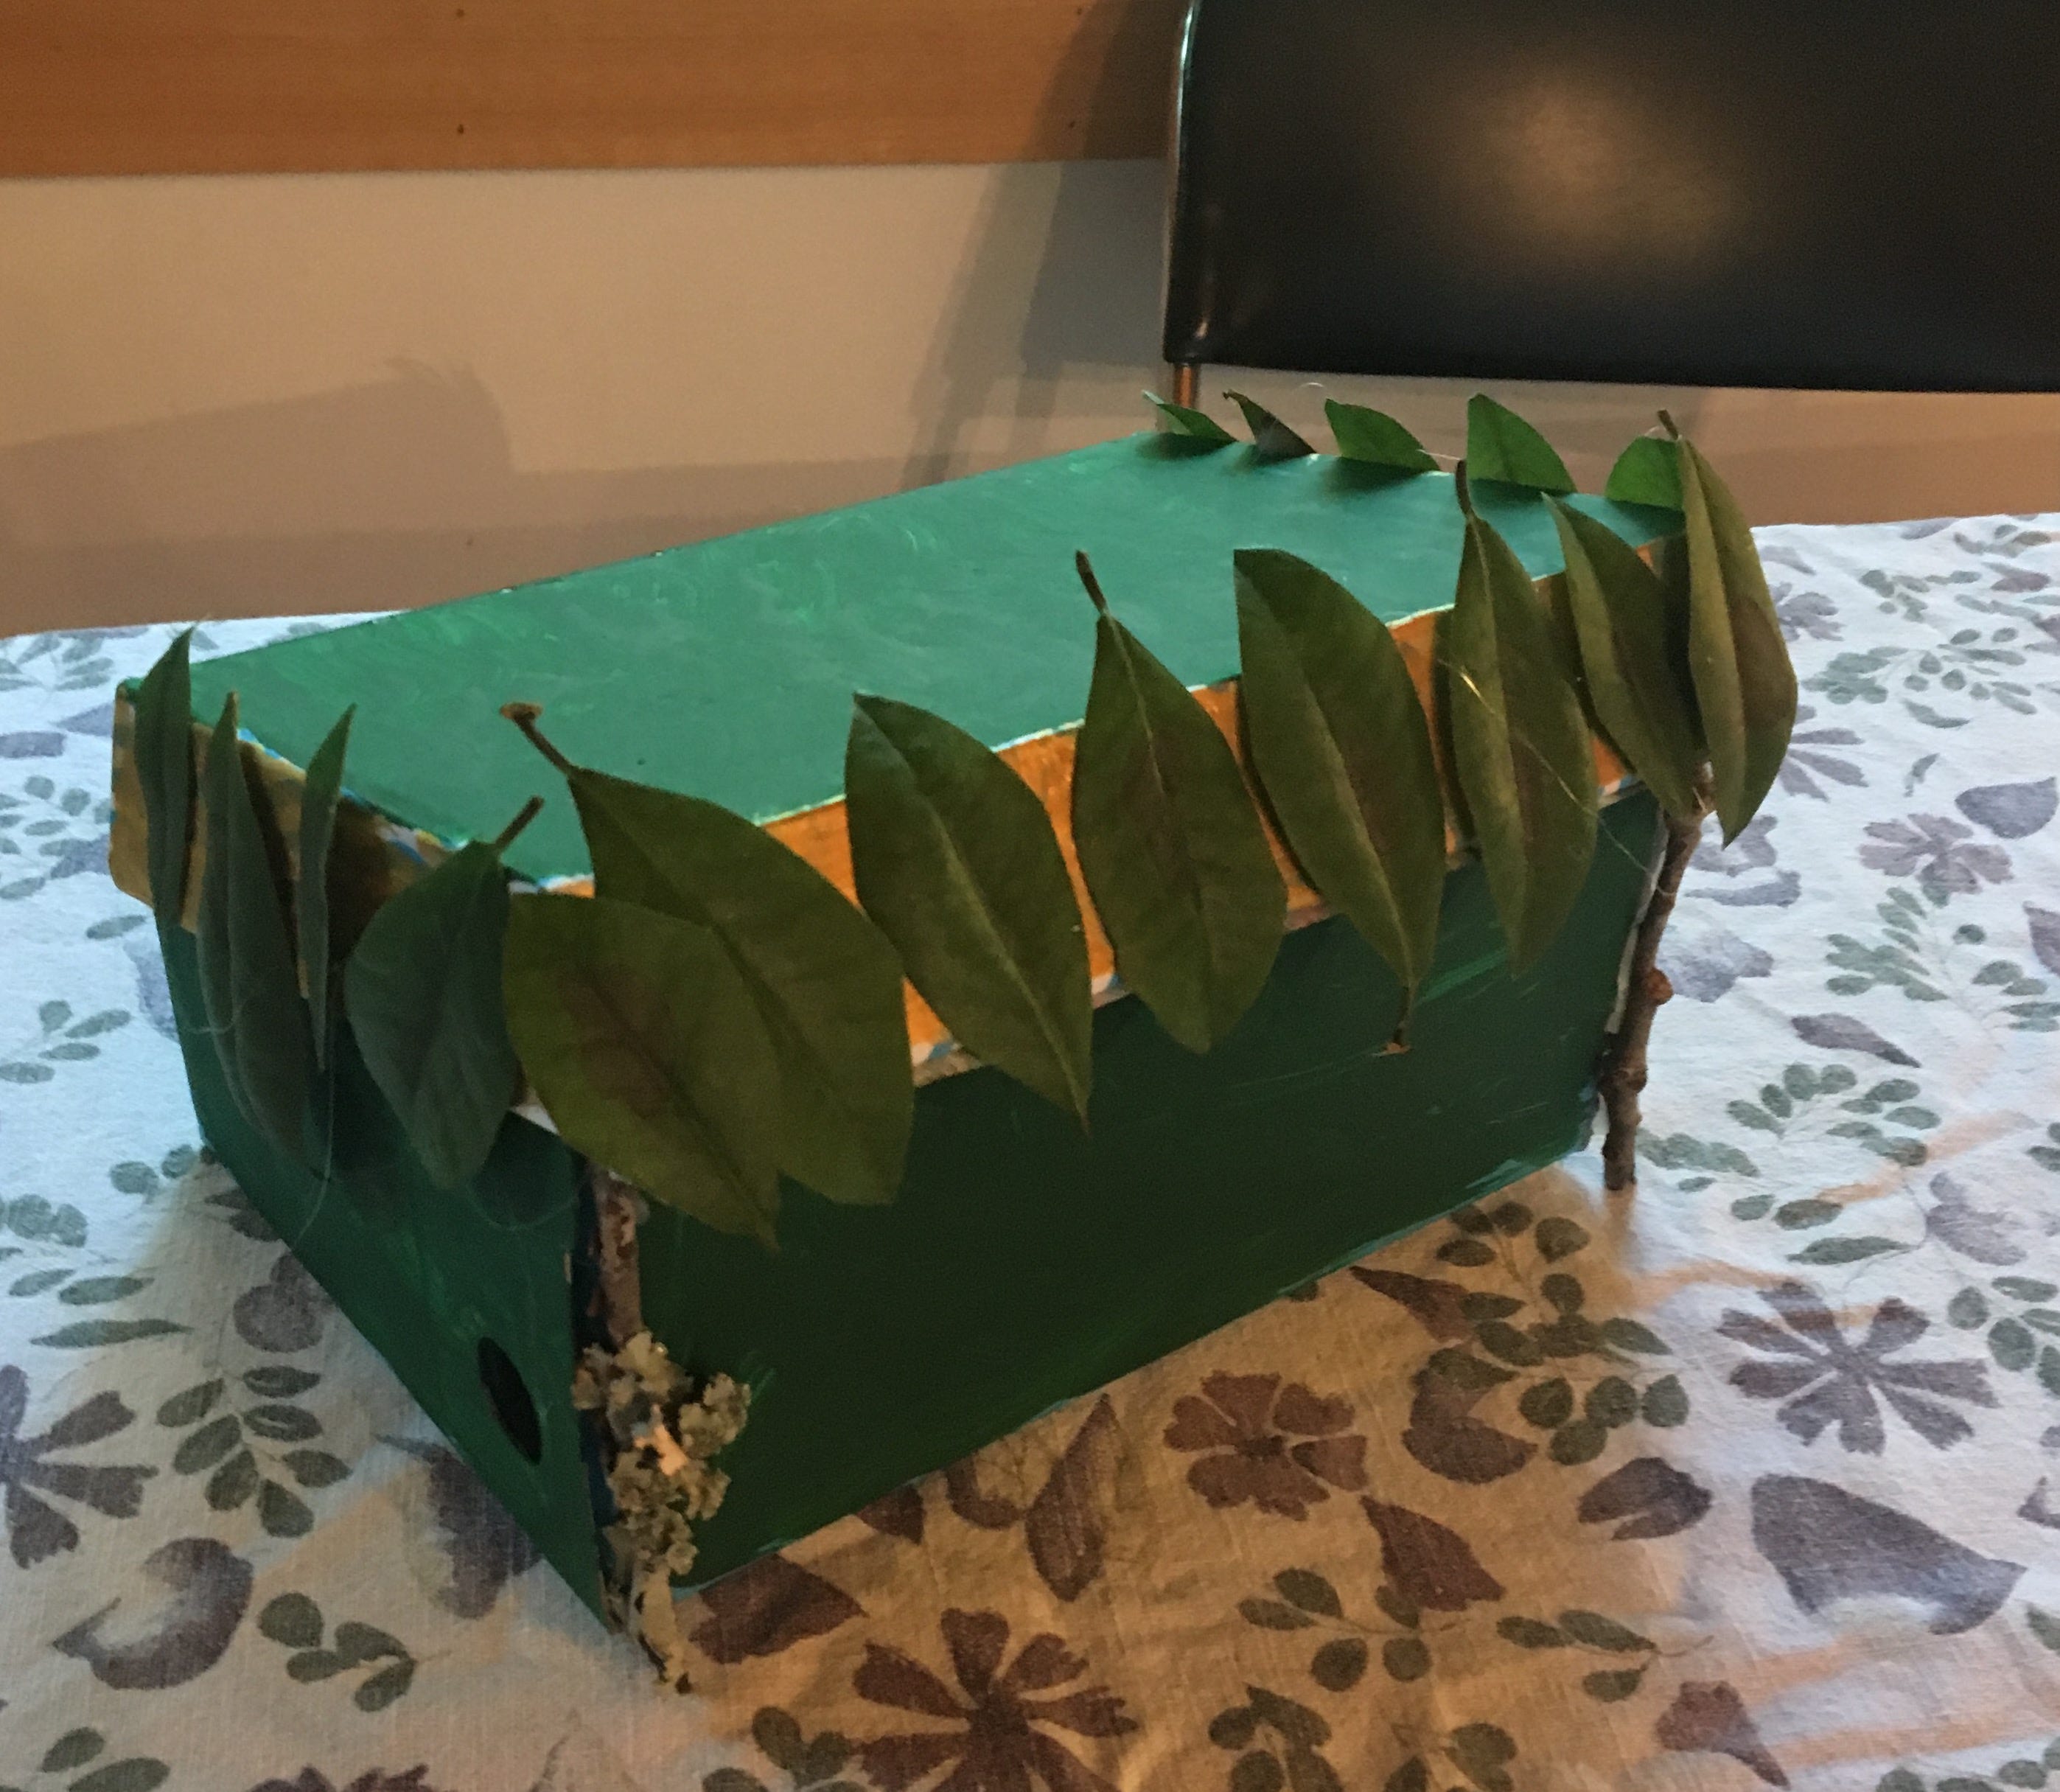
If you’re more the woodland fairy type, or you don’t have a lot of shells lying around, no problem! The woodland fairy box is pretty special too. For this one you’ll need:
-shoebox (same deal—small is charming! and easier!)
-paint and brushes
-sturdy leaves, twigs, and pretty rocks. Lichen could be cool also (above, we chose a stick with some lichen on it). Also mussel shells, if you have access to those? Pine cones, the tiny kind, are also cool.
1. Paint your shoebox! We painted our fairy box green and gold.
2. Add leaves with glue, all around the sides of the box top. Hot glue works best.
3. Add twigs and rocks in a special pattern. Here’s a tip: pine cones are really good for lids, handles, or even as the “feet.” You can use one pine cone in the middle on the lid of the box and pine cones on the side as handles.
4. Keep adding special fairy items!
5. This is a good one to paint with Mod Podge because it will preserve your leaves.
6. Fill with treasures—or present to your lucky recipient!
Are you more of a mermaid or a fairy? Do you like collecting shells and other natural treasures? Harriet is really good at finding heart-shaped rocks.
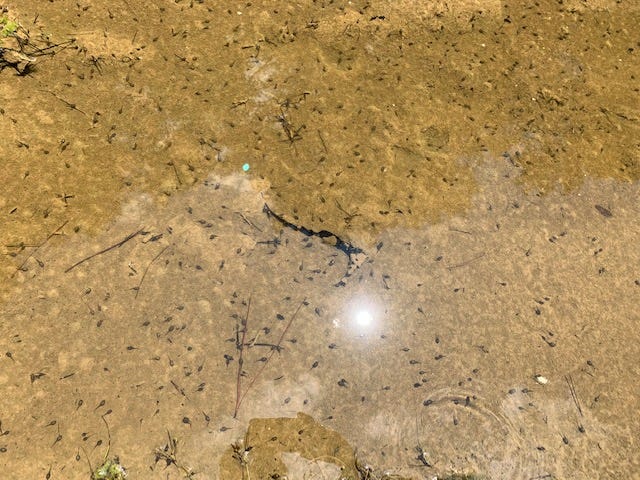
P.S. Can you believe we found another tadpole puddle, about to dry up? We’ve been rescuing tadpoles all week… more on frogs and tadpoles on Sunday. See you then!
Mermaid!🙋🏼♀️