
How to make...
tiny book ornaments out of paper!


What is it about miniatures? Doll houses, fairy gardens, terrariums, little dioramas… we love realistic depictions of life made tiny (maybe because it makes us feel big and powerful? Or because it’s a world we control?). When the pandemic began, Bea and I worked on some cardboard dollhouses for a while, and then, last winter, decided to teach ourselves how to make realistic tiny books using scraps and art supplies we already had around the house. It all started with this video…
Bea and I have now taught several friends how to make tiny books, and we think the best way is to watch this video a few times, which is wordless and kind of mesmerizing and soothing.
We made a couple of versions of the hardback, cloth-bound book in the video before switching it up. The book in the video is very small—the artist cuts pages that are only 2.5 centimeters by 4 centimeters. Out favorite part was sanding the edges of the paper, then staining the paper with tea.
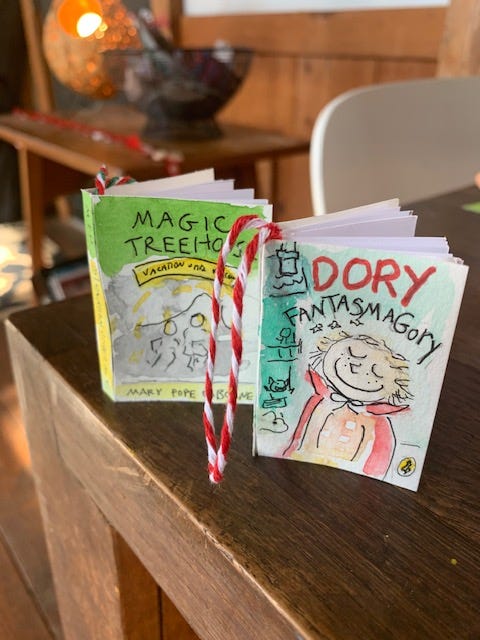
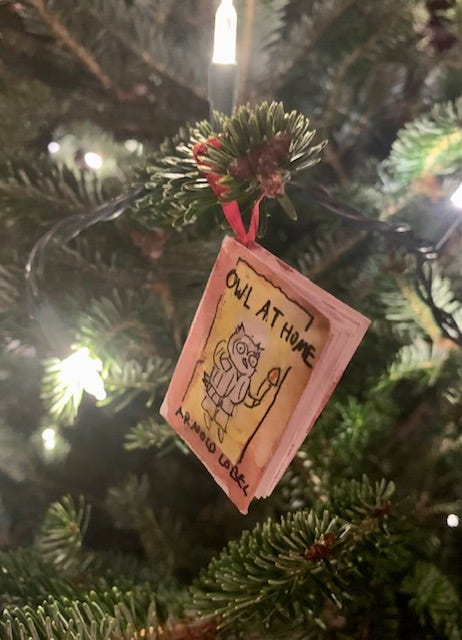
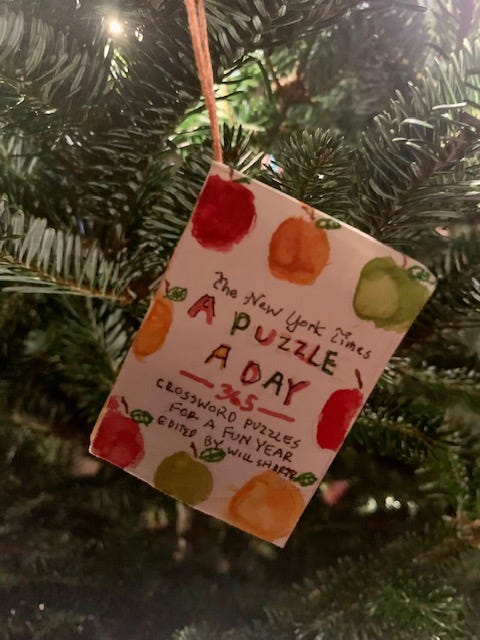
For our adapted version, we decided to make slightly larger books, with slightly fewer sections (sewing the sections is the hardest part). The biggest changes we made were to make the covers out of watercolor paper, scored and folded into three sections (for the front, spine, and back). This has two advantages: first, it’s easier not to have to wrap the book in fabric, which can be a little tricky on a very small book (though it does look pretty). Second, it means you can make the cover look like one of your favorite, real books by decorating it with markers or watercolor and ink. In place of a ribbon bookmark, we also used the spine (between the sewn pages and the cover) to secure a loop of embroidery floss or ribbon that we use as a hook.
These books make great Christmas ornaments, decorative gifts for a friend who loves to read—or an author friend, which we’ve also done!
Here’s what you’ll need to make them:
-Scissors
-School glue
-Pencils and paintbrushes
-Watercolor paint (these are our favorite)
-Ink pens that won’t bleed
-Plain white paper
-Watercolor paper
-A paper cutter (this portable one is older than Bea and still sharp!) or an X-acto knife (use with an experienced adult)
-Needle and thread
-Emery boards or buffers
-Fabric scraps
Nice to have:
-A bone folder
-Mod Podge
Here are the basic steps (but watch the video!):
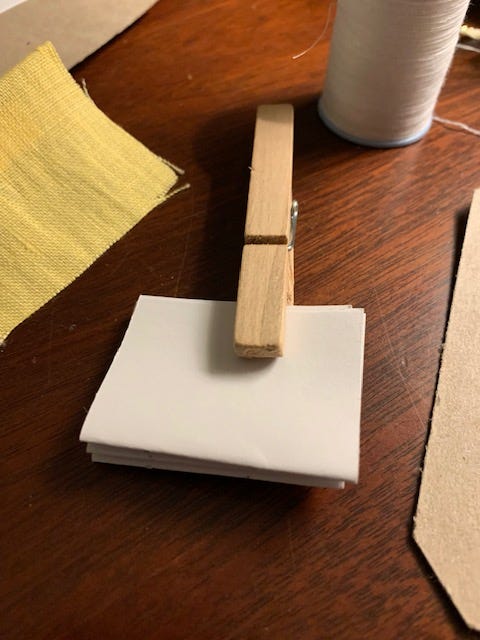
1. Cut paper into strips all the same width, then cut the strips into pieces that are the same length. Fold equal sections (about three or four pages each) with a bone folder or ruler, then collect them all into a clothespin or binder clip (leaving the folded side exposed).
2. Draw two lines across the folded part with a pencil. The marks will show you where to punch holes. Do that.
3. Thread a needle, double knot the end, and sew through the holes you’ve punched in the first section of pages. Pick up the next section, and attach it to the first with thread. This description doesn’t make sense; I’m sorry. Watch the video and don’t stress too much! Just do your best to get all the sections linked together.
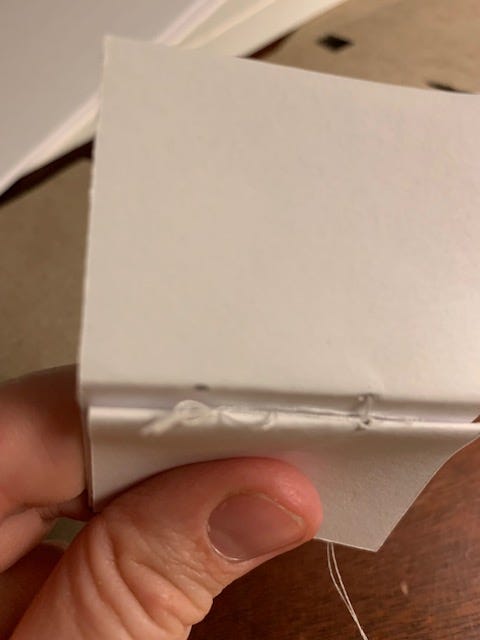
4. Cut a small fabric scrap and paste it over your sewn binding. Press it down firmly and clip the pages again.

5. After the binding is mostly dry, unclip the book and use an emery board to sand the edges down, slightly rounding the corners. This will help the book hold together and feel like a unit. (This is also when you’d tea-stain the book, if you want to do that.)
6. Next, measure a piece of watercolor paper that is slightly larger than your pages. Cut it with the X-acto knife or the paper cutter, and use the knife (or, our paper cutter has a removable sharp edge we use) to score the parts that will fold to make the front cover, spine, and back cover.
7. Paint your cover. We usually look at a photo of our book or the book itself, then apply a wash of color that approximates the look of the cover. Then we add detail, including the title, with a very fine point pen.
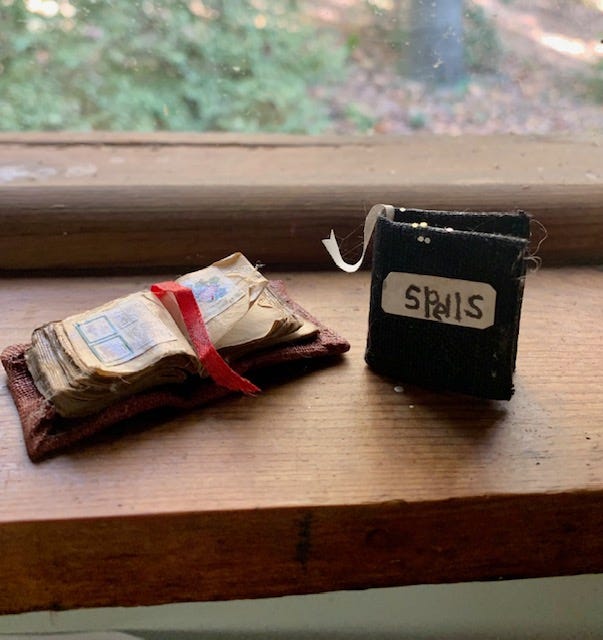
8. Glue the pages to your cover, adding a loop of thread or ribbon between the spine and the cover if you’d like to use the book as an ornament. (If you forget to do this, you can also sew the thread into your book’s spine with a very thin needle, as in Charlotte’s Web above.)
9. Bonus points! Make a bookmark and paste it inside the book. For a teacher or avid researcher/note-taker you could make tiny sticky notes from yellow paper and glue them to the pages—ahhhhh so cute!
10. If you want the book to have a shiny look, apply Mod Podge to the cover—just make sure to test on the colors you’ve used, to make sure they won’t bleed. Also, beware! They are now making glitter Mod Podge and we accidentally bought some of that.
11. If you’re giving them as a gift, old jewelry boxes (see above) make a great presentation.
As Bea says, “People like tiny things. And they’re fun to make.” At Weymouth she made a book for a friend who shares her love of the Percy Jackson series, and we’re thinking of how to adapt the project for her classroom.
Do you have a favorite craft? Would you try this one?
Well, this is SLIGHTLY off the tiny books subject, Belle and Bea .
. but I get a thrill out of seeing my 1970's "handiwork" in the background of your photos !
In this episode, a couple of window sills and the kitchen countertop - made from (new in 1975) unfinished oak floor boards... now, they are well vegetable-oiled with a 46 year patina.
The fact that you all use, enjoy and preserve that home means a LOT to this Old Guy !
:)
This is absolutely so cool and amazing!!! I have not watched the video yet. Baby steps. I feel like it’s a foreign language I am reading. Don’t get me wrong; I think it is fabulous but I think you underestimate your artistic talent compared to the general population. I am going to rest my brain and then watch the video.I will let you know how it goes. I am going to tackle this project. Thanks for sharing. My love to all of you!!!