


DIY valentine gifts
for all your energetic friends, plus celebrating Douglass Day

“What are you guys doing?”
“Making marbled paper bookmarks with shaving cream from the 80’s.”
“Okay, cool.”
This was the exchange this morning after Richard came back from dropping Harriet off at preschool—one of those weird school days where Bea has a teacher work-day, and Harriet doesn’t. On Monday it will be the reverse.
Monday is also Valentine’s Day, and so far we’ve always made our valentines. When Bea was in kindergarten we made watercolor hearts and wrote a special compliment for each kid. Bea tore her hair out writing “You are very energetic” for most of the boys.
This year, we decided to make bookmarks—a useful thing that won’t get thrown away after the candy is ripped off (we are not attaching candy).
We’ve already shown you how to make marbled paper with nail polish, but did you know you can also marble paper with watered-down acrylic paint and shaving cream or liquid starch? We’ll show you how, plus a cool, more elaborate accordion card you can make for teachers and grandparents.
For the bookmarks you need:
-thick paper (watercolor or cardstock), sliced into bookmark-sized rectangles. We used our handy paper cutter to make clean edhes.
-acrylic or liquid watercolor paint, jars, paintbrushes
-a stirring stick, like the end of a paintbrush or a popsicle stick
-droppers if you have them. If not, you can just use a paintbrush.
-A piece of cardboard or a dough scraper for scraping
and
-shaving cream (not necessarily from the 80s, but ours was very old and yet still foamy!)
OR
-liquid starch (we made our own by heating three cups of water with a quarter-cup of cornstarch, then letting it cool)
Here’s what you do:
1. Because this is a messy project, cover your table or work outside.
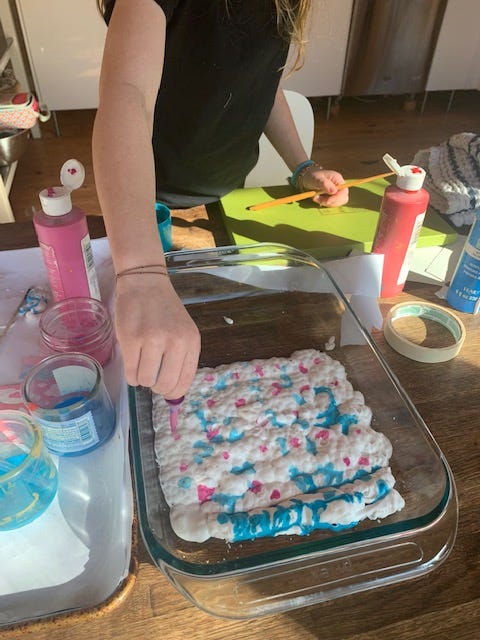
2. Put a few drops of paint, in three or four colors you like, into your cups or jars. Mix in a little water until the paint looks “milky.” This makes the paint lighter, so it will sit on top of the substance you’re using for the marbelizing base.
3. Spray your shaving cream into a dish, like a pyrex dish or a lasagna pan, that will hold several bookmarks face-down at once. Or, if you’re using liquid starch, pour about a half-inch into your dish.
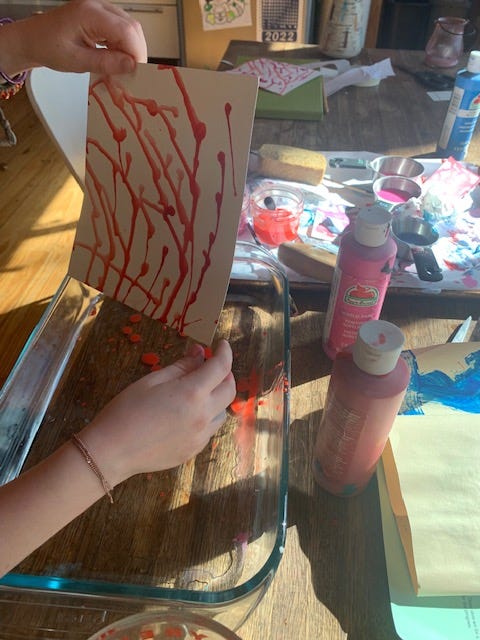
4. Drip your paint into the dish of foam or starch, making small dots. You can do this in a pattern or just randomly dripping.
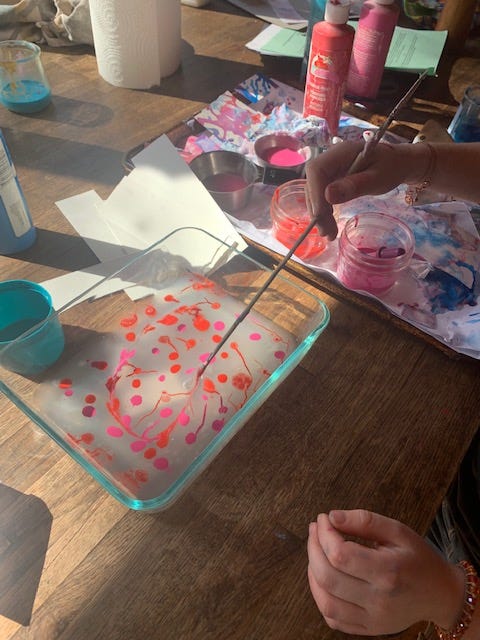
5. Use your stick to swirl around the paint until it looks pretty—like marble.
6. Carefully set your bookmark on top, making sure all edges touch the shaving cream or the starch. Lift it up again. Ta-da! It should look very pretty.
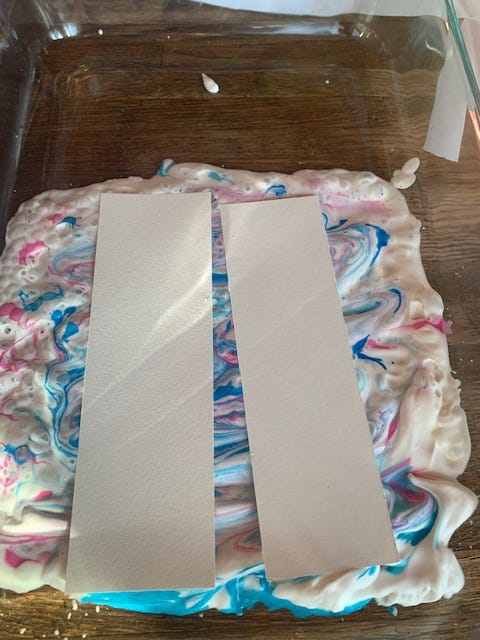
7. Scrape off the excess starch or shaving foam with your scraper.
8. Repeat! Clean your dishes and brushes quickly if you’re using acrylic—it stains!
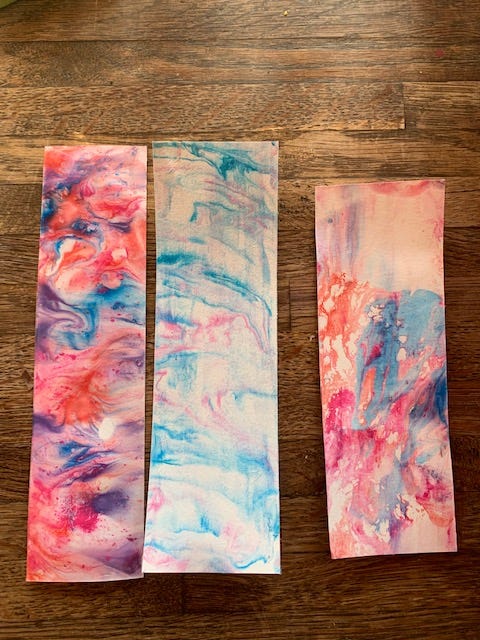
When the bookmarks are dry, you can hole-punch them and add some embroidery thread or a ribbon.
Bea also enjoyed using the droppers to make drip paintings, and the dishes of paint to experiment with dip-dying.
Which came in handy when we made…
Accordion booklets from envelopes!
This is one of my favorite simple art projects. An accordion book is a book that can be folded out like an accordion, which makes it great for display. Even easier than a regular accordion book made with folded leaves of paper is one made from envelopes (especially if they are self-stick!). The envelopes give the booklet a nice heft, plus when you link them together you have pockets for storing secret love messages!
Here is all you need:
-Some card-sized envelopes (we picked up a box of colorful ones, and we had some holiday card leftovers).
-Glue or glue stick (we prefer a large bottle of glue that can be poured into a dish—less plastic than the constantly-drying-out glue sticks.)
-Cardstock or watercolor paper
-Paper cut to insert into the envelopes
-Markers, paint, colored pencils, etc.
1. Lay out your envelopes, all facing the same way, with the front of the envelope facing down and the envelope flaps open. We made one with four cards, and one with three, but you can use more.
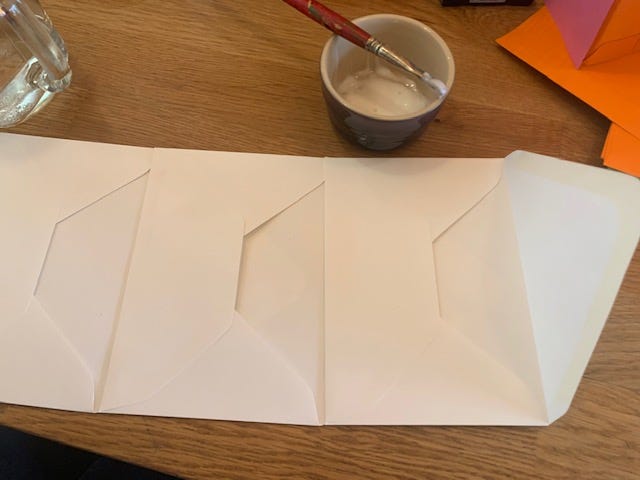
2. Apply glue to the flaps, and glue them the the bottom of the envelope that’s next in the chain. Leave a little space between the fold line of the envelope flap and the envelope so that it folds easily, and try to line everything up as straight as possible.
3. Fold the envelopes accordion-style, and…
4. Add a card stock/thick paper front and back cover. We used two of Bea’s drip paintings, trimmed with a paper cutter to be just a little larger than the envelopes.
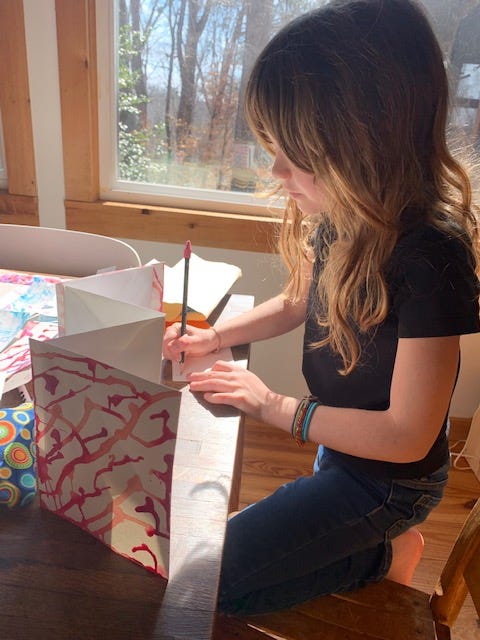
5. Finally, write your love notes. Bea made one for her teacher with her favorite memories (so far) of second grade. You could make a “Best things about visiting Nana and Grandpa” or a “Top ten things to do with Mamie and Grampa.”
Do you make your own cards? Any favorite styles?
P.S. Did you know that Valentine’s Day is also a day for celebrating Frederick Douglass’s birthday? Like many people born into slavery, Douglass didn’t know the exact date of his birth. After he escaped to freedom, he recalled that his mother, who died when he was very young, called him her “little valentine,” so he chose Valentine’s Day as his birthday.
Douglass Day, a collective dedicated to preserving and sharing Black History, invites people every year to get involved in service work. This year’s focus is on the presence and activism of Black women in the Colored Conventions of the 1800s. Volunteers are invited to participate in a transcribe-a-thon on Monday, February 14 from 12-3 Eastern. Learn more or sign up here.
Here’s a video that explains how Douglass Day eventually inspired Black History month:
And more about how a Douglass Day transcribe-a-thon works:
Would you try this? I’m going to sign up!